Springtime is bursting with color, and so can your little one's art projects! Get ready for some messy, marvelous fun with these lively crafts. Paint rainbow handprint flowers, create tissue paper butterflies, or make colorful salt dough imprints. Let them sponge-paint spring trees or craft adorable egg carton caterpillars. Try bubble wrap blossom prints or sunny paper plate sun catchers. Don't forget fluffy cotton ball lambs and watercolor resist umbrellas! These projects are perfect for tiny hands and big imaginations. They'll boost creativity, fine motor skills, and bring springtime cheer indoors. But wait, there's more to discover in the world of pint-sized Picassos!
Creative Highlights
- Rainbow Handprint Flowers combine vibrant colors with personal keepsakes, teaching color recognition and fine motor skills.
- Tissue Paper Butterfly Collage offers a tactile experience while creating bold, colorful art suitable for gifts.
- Sponge-Painted Spring Trees explore texture and color combinations, developing hand-eye coordination in young artists.
- Finger-Painted Tulip Garden encourages sensory exploration and creativity through direct engagement with paint.
- Bubble Wrap Blossom Prints provide a unique texture-based painting experience, allowing for color mixing and pattern creation.
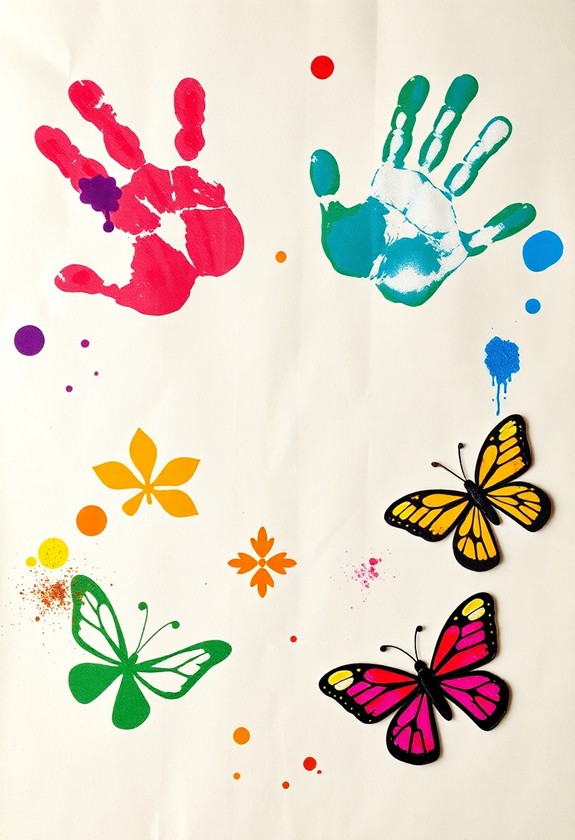
Rainbow Handprint Flowers
With spring in full bloom, Rainbow Handprint Flowers offer a delightful way to engage your little ones in creative art. This colorful project is as easy as 1-2-3! Art promotes development by enhancing fine motor skills, hand-eye coordination, and cognitive abilities in toddlers. It likewise provides a wonderful opportunity for self-expression and boosts confidence.
Here's what you'll need:
- Washable paint in rainbow colors
- White paper
- Green construction paper
- Scissors
- Glue
Let's get started:
- Paint your child's hand with different colors.
- Press it onto white paper – voila, a flower!
- Cut out a stem and leaves from green paper.
- Glue them to complete your masterpiece.
Watch as your budding artist creates a garden of handprint blooms! This hands-on activity isn't just fun – it's a great way to teach colors and fine motor skills. Plus, you'll have a priceless keepsake of their tiny hands. So, get ready to make some flower power magic!
Tissue Paper Butterfly Collage
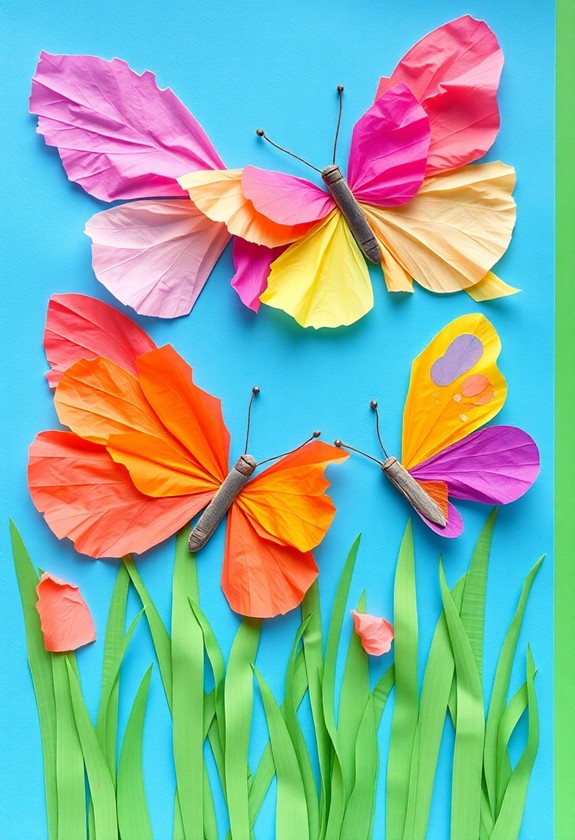
Fluttering from flowers to butterflies, our next spring art project takes flight with a Tissue Paper Butterfly Collage. Get ready to create a dazzling, colorful masterpiece!
Here's what you'll need:
- Colored tissue paper
- White paper
- Glue stick
- Scissors
- Black marker
Start by drawing a simple butterfly outline on white paper. Now, let's get snipping! Cut the tissue paper into small squares. It's time to bring your butterfly to life! Glue the tissue paper squares onto the butterfly shape, overlapping them slightly. Mix and match colors for a lively effect. Don't forget the antennae! This project is perfect for toddler crafts and makes a wonderful gift for Dad's birthday celebration.
Want to make your butterfly pop? Add a bold black outline with your marker. Voilà! You've created a fluttery friend that's certain to brighten up any room. Hang it up and watch your butterfly soar!
Colorful Salt Dough Imprints
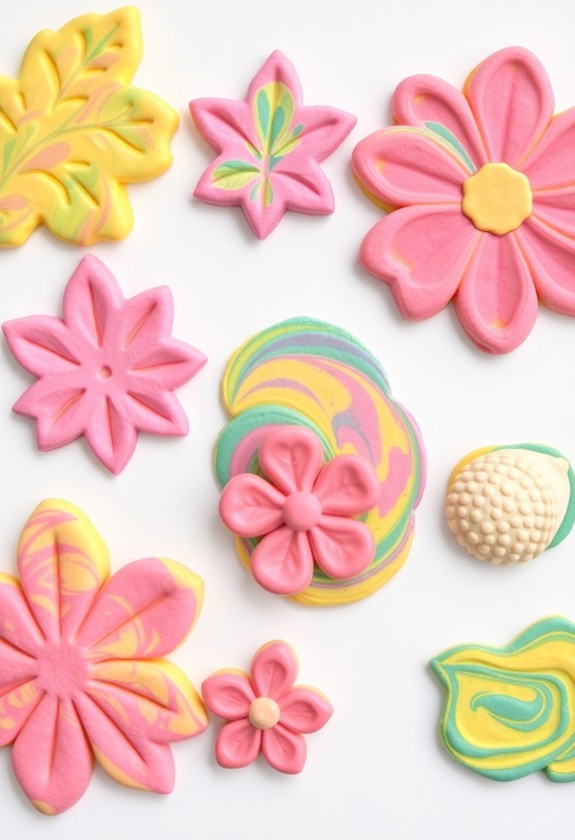
Three simple ingredients transform into a canvas for creativity with Colorful Salt Dough Imprints. You'll love this fun, hands-on project that's perfect for little artists! Mix flour, salt, and water to create a pliable dough, then let your kids' imaginations run wild. They can press objects into the dough or use cookie cutters to make shapes. This activity improves fine motor skills and encourages artistic expression, much like other toddler-friendly art projects. But wait, there's more! Add a burst of color to make these imprints truly stand out:
- Food coloring for lively hues
- Glitter for sparkly magic
- Natural items like leaves or flowers
- Beads or sequins for texture
- Paint to decorate after drying
Once you've created your masterpieces, bake them in the oven to preserve them forever. It's like making fossils, but way more colorful and exciting! Your little ones will be thrilled to display their spring-inspired art for all to see.
Sponge-Painted Spring Trees
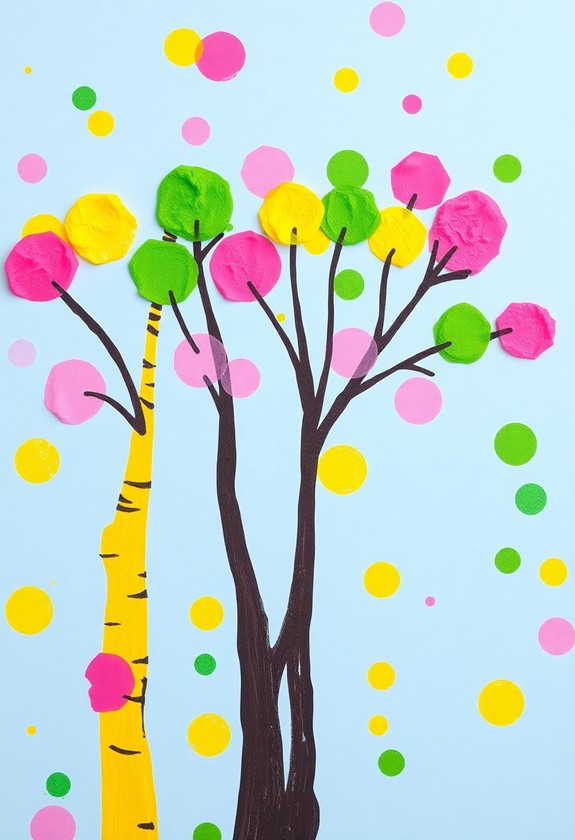
Sponge-Painted Spring Trees offer a delightful way for little ones to explore texture and color during the creation of lively spring scenes. Get ready for some sponge-tacular fun! Here's what you'll need:
- Brown construction paper
- Colorful sponges
- Green, pink, and white paint
- Scissors
First, cut out a tree trunk from the brown paper. Glue it onto a blank sheet. Now, it's time to make those trees bloom! Dip your sponges in green paint for leaves, and pink or white for blossoms. Dab away! Watch as your tree comes to life with each press. This activity is perfect for developing fine motor skills in toddlers, much like the triangle-shaped crayons and markers mentioned earlier. For added creativity, consider using eco-friendly materials to make your own sponges. Don't worry about being neat – nature isn't perfect! Encourage your little artists to experiment with different sponge shapes and color combinations. Before you know it, you'll have a forest full of springtime cheer!
Egg Carton Caterpillar Craft
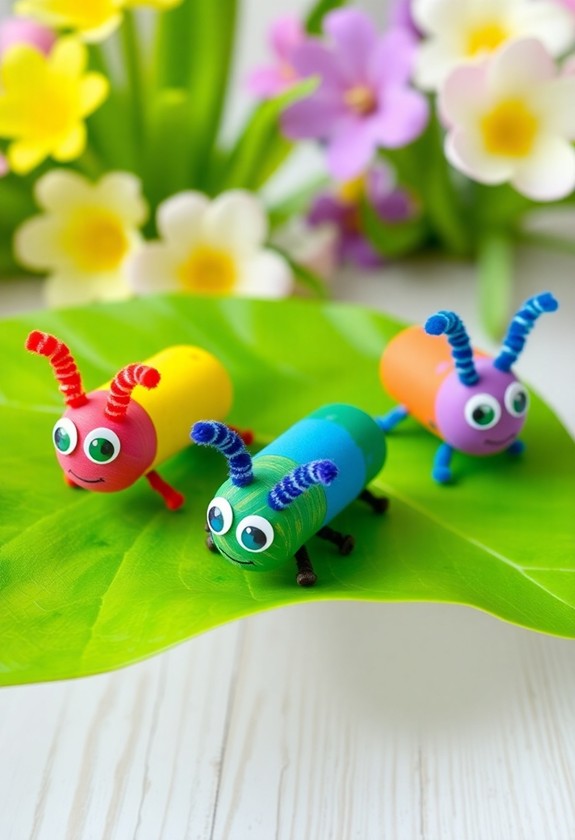
With spring in full swing, the Egg Carton Caterpillar Craft brings a touch of whimsy to your little one's art projects. It's a fun, eco-friendly way to recycle those empty egg cartons! Get ready to create a cute, crawly friend with just a few simple materials. This project is a great way to shift from fall-themed crafts to spring-inspired creations, keeping your toddler engaged year-round.
You'll need:
- Empty egg carton
- Scissors
- Paint and brushes
- Googly eyes
- Pipe cleaners
First, cut the egg carton into a strip of 4-6 cups. Let your child's imagination run wild as they paint their caterpillar in lively spring colors! Once dry, add googly eyes for extra character. Finally, poke holes and insert pipe cleaners for antennae and legs. Voila! Your little one has just "hatched" an adorable caterpillar companion. This craft is guaranteed to "bug" them with excitement and creativity!
Finger-Painted Tulip Garden
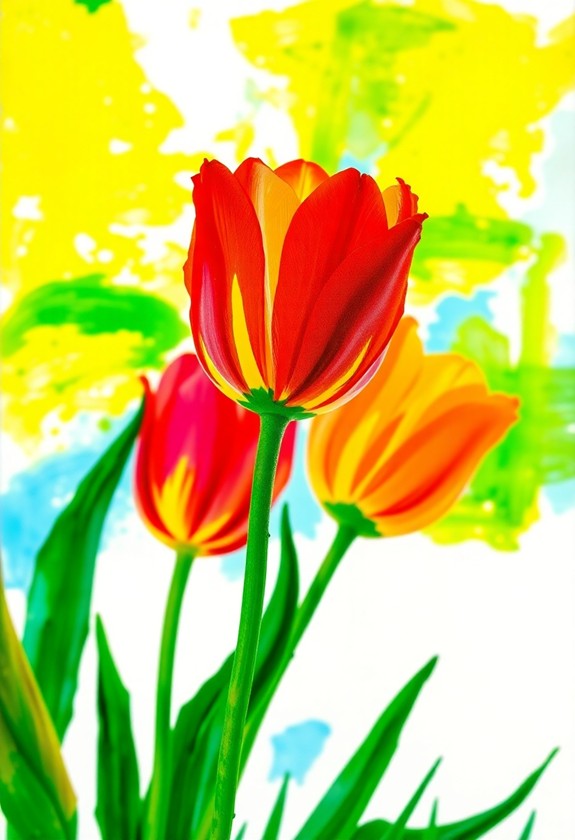
Finger-painting takes center stage in this colorful tulip garden project. It's time to get messy and creative! Here's what you'll need:
- Large white paper
- Washable finger paints (red, yellow, green)
- Paper plates for paint
- Wet wipes for clean-up
Ready to bloom? Let's dig in!
- Spread your paper on a flat surface.
- Pour paints onto plates.
- Dip your fingers in green paint and create stems from the bottom up.
- Now for the fun part – tulip time! Use red and yellow to make lively flower heads.
- Mix colors for a rainbow of tulips!
Watch your garden grow with each finger-stroke! Don't forget to add leaves and maybe even a buzzing bee or two. This tactile project is certain to put a spring in your step and color on your fingers!
Bubble Wrap Blossom Prints
Pop into spring with this delightful bubble wrap printing project! You'll love creating these beautiful blossom prints using a unique technique. It's easy, fun, and oh-so-springy!
Here's what you'll need:
- Bubble wrap
- Paint in spring colors
- Paper
- Scissors
- Paintbrush
Cut bubble wrap into flower shapes, then dab paint onto the bubbles. Press the painted side onto paper, and voila! You've got gorgeous, textured blossoms. Mix colors for a lively garden, or stick to pastels for a soft, dreamy look. Kids will adore the satisfying pop as they create their masterpieces!
Want to take it up a notch? Add stems and leaves with a paintbrush, or sprinkle glitter for extra sparkle. This project's guaranteed to put a spring in your step and a smile on your face!
Paper Plate Sun Catcher
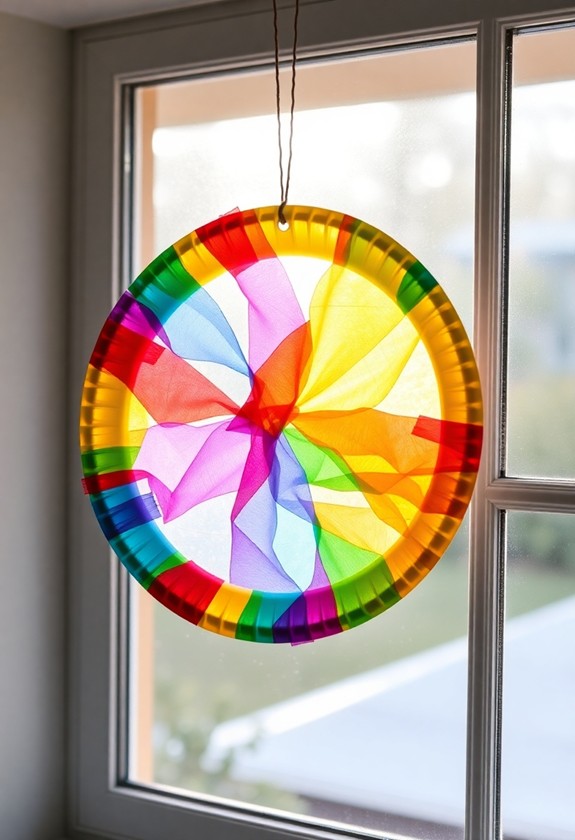
Brighten up your windows with a colorful paper plate sun catcher! This fun, easy project is perfect for little hands and big imaginations. Here's what you'll need:
- Paper plate
- Tissue paper (various colors)
- Clear contact paper
- Scissors
- String or ribbon
Start by cutting out the center of your paper plate, leaving a ring. Next, cut your tissue paper into small squares. It's time to get creative! Lay a piece of contact paper sticky-side up on the plate, then let your little one go wild arranging tissue paper squares on it. When they're done, cover with another layer of contact paper. Trim the excess, and voila! Hang your masterpiece in a sunny spot and watch the colors sway. It's like stained glass made easy – a rainbow of fun!
Cotton Ball Lamb Art
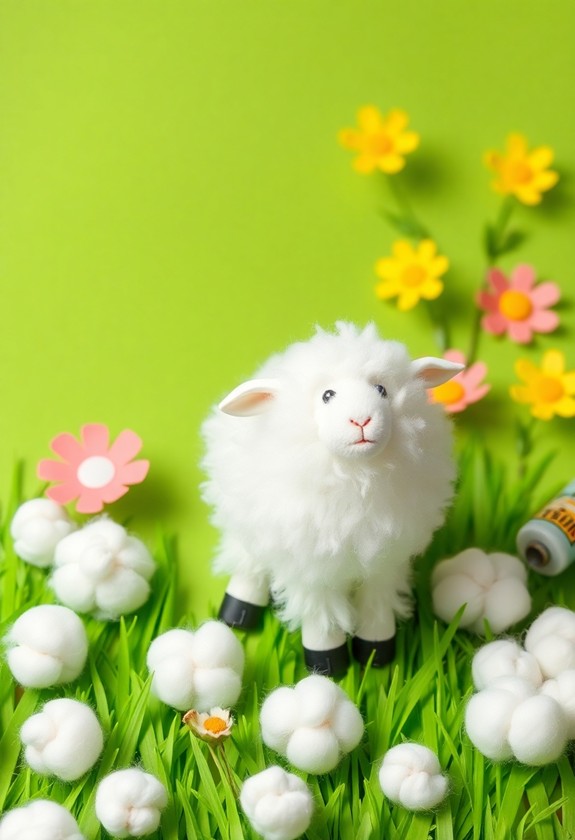
A fluffy and adorable spring craft awaits with Cotton Ball Lamb Art! This project is perfect for little hands and big imaginations. You'll love watching your child's creativity bloom as they bring their woolly friend to life.
Here's what you'll need:
- Paper plate
- Cotton balls
- Black construction paper
- Glue
- Scissors
- Googly eyes (optional)
Start by cutting the paper plate in half – that's your lamb's body! Next, let your little one go wild gluing cotton balls all over. It's so fun and squishy! For the head, cut an oval from black paper and add it to one end. Don't forget those adorable ears and legs! Finally, give your lamb some personality with a cute face. Ta-da! You've created a springtime masterpiece that's certain to make everyone say, "Baa-utiful!"
Watercolor Resist Umbrella Painting
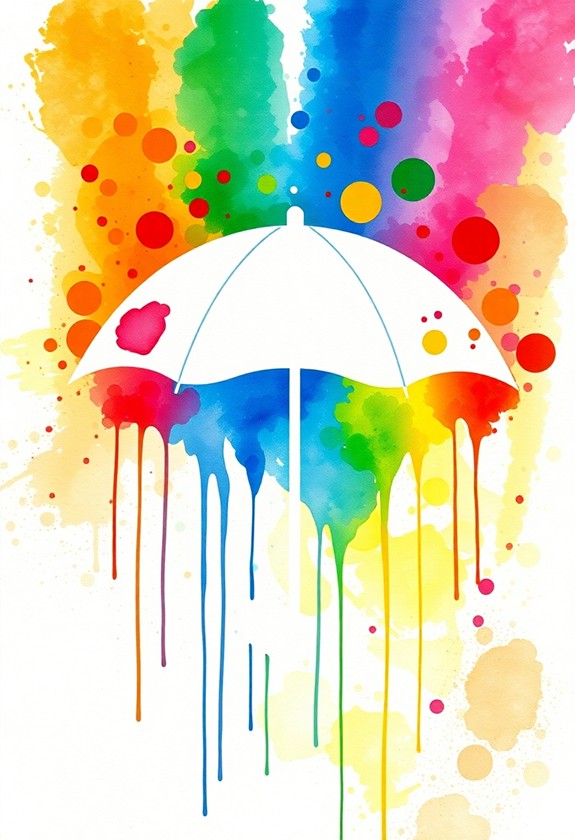
From woolly lambs to rainy day fun, let's explore another exciting spring art project. Get ready for a splash of color with Watercolor Resist Umbrella Painting!
Here's what you'll need:
- White paper
- Crayons (white or light colors)
- Watercolor paints
- Paintbrush
- Water cup
Let's make it rain… with art!
- Draw an umbrella shape with a crayon
- Add fun patterns inside – zigzags, swirls, or polka dots
- Paint over your drawing with watercolors
Watch the magic happen! The crayon resists the paint, creating a gorgeous effect. It's like your umbrella is shielding itself from a colorful downpour! Experiment with different colors and patterns. Why not add some splashy puddles or raindrops too? This project is perfect for brightening up those April showers!
Curious Little Questions
What Age Group Are These Spring Art Projects Most Suitable For?
You're in for a treat! These spring art projects are perfect for little ones, typically ages 3-8. They're designed with your preschoolers and early elementary kiddos in mind. Why? Since they're:
- Simple enough for tiny hands
- Safe and mess-friendly
- Quick to complete (hello, short attention spans!)
- Bursting with color and creativity
But don't let that stop you! Older kids and adults can join the fun too. After all, who doesn't love getting their hands messy with some springtime art?
How Can I Make These Projects Suitable for Children With Sensory Issues?
You can make these projects sensory-friendly in so many fun ways! Here are some awesome ideas:
- Use textured materials like foam, felt, or bubble wrap
- Offer scented paints or play dough for smelling fun
- Try finger painting or using large brushes for easier grip
- Create quiet zones for kids who need breaks
- Provide noise-canceling headphones for sound-sensitive children
- Use calming colors and soft lighting in the art area
Are There Any Alternatives for Children With Allergies to Common Craft Materials?
You'll love these allergy-friendly alternatives! Swap glue for tape, use rice instead of glitter, and try natural dyes from fruits and veggies. But wait, there's more! Craft with paper straws, felt, or foam sheets. And don't forget about clay – it's a hands-on favorite! For painting, go for washable, non-toxic options. Remember, safety first! Always check ingredients and test materials before diving in. With these swaps, your little artists can create masterpieces without worry. Let's get crafting!
How Long Does Each Project Typically Take to Complete?
The time it takes to complete each project can vary, but don't worry – they're all designed to be fun and manageable for little ones! Most projects typically take about 20-30 minutes, perfect for short attention spans. Some quick crafts might only need 10-15 minutes, whereas more involved projects could stretch to 45 minutes or an hour. Remember, it's not a race! Let your child's creativity flow at their own pace. The joy is in the process, not just the finished product!
What Are Some Ways to Display and Preserve These Spring Art Creations?
Let your little artists' creations bloom for all to see! You've got so many fun ways to showcase their spring masterpieces. Try these ideas:
- Create a colorful gallery wall in their room
- Make a scrapbook of their best works
- Snap photos and create a digital slideshow
- Use clothespins to hang art on a string
- Frame special pieces as gifts for family
And don't forget to preserve their art! Laminate delicate pieces or use clear spray to protect paintings. Your budding Picassos will love seeing their work on display!