Get ready to transform trash into treasure with these 10 amazing recycled crafts for preschool seasonal art! You’ll love creating an Egg Carton Spring Flower Garden, Toilet Paper Roll Fall Trees, and Plastic Bottle Winter Snowmen. Make a splash with a Newspaper Summer Beach Scene or rustle up a Cardboard Box Autumn Leaf Collage. Build a cool Milk Jug Winter Igloo, or let imaginations soar with a Magazine Summer Butterfly Mosaic. Light up the night with a Tin Can Fall Luminary, and fence in creativity with a Cereal Box Spring Garden Fence. These eco-friendly projects aren’t just fun – they’re fantastic for developing skills and learning about seasons! Stick around for more crafty details.
Creative Highlights
- Crafts using egg cartons, paper plates, and cereal boxes teach recycling while developing fine motor skills and creativity.
- Newspaper and magazine projects encourage discussions about seasons and nature while promoting environmental awareness.
- Toilet paper rolls and cardboard boxes can be transformed into autumn-themed crafts, reinforcing recycling concepts.
- Repurposing plastic bottles and milk jugs for winter crafts combines recycling education with imaginative play.
- Seasonal crafts using recyclable materials provide hands-on learning experiences about environmental responsibility and artistic expression.
Egg Carton Spring Flower Garden
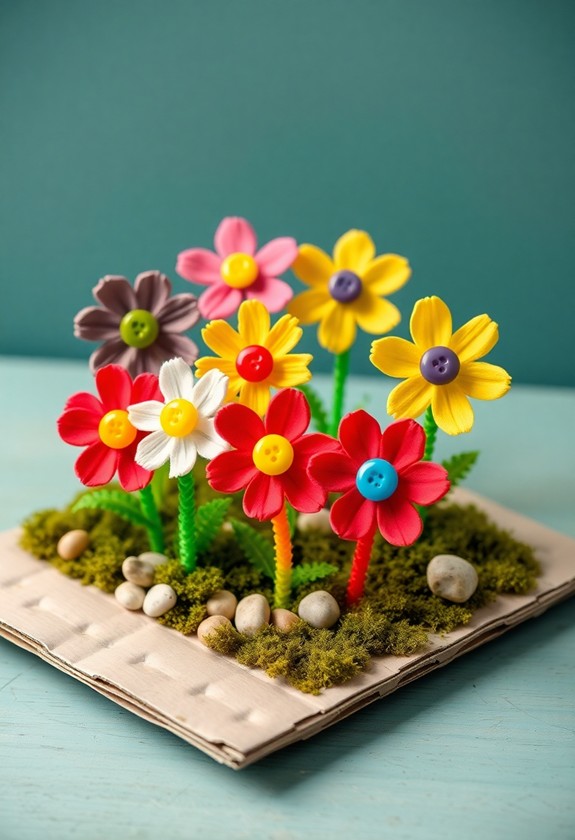
With spring in the air, an egg carton spring flower garden is a perfect craft for preschoolers. It’s time to turn trash into treasure! This eco-friendly craft promotes sustainability values during encouraging creativity and fine motor skill development. Grab those empty egg cartons and let’s get crafting!
Here’s what you’ll need:
- Empty egg cartons
- Scissors
- Paint and brushes
- Pipe cleaners
- Glue
Now, let’s bloom into action:
- Cut the egg carton cups apart.
- Paint each “flower” in lively colors. Get creative!
- Once dry, poke a small hole in the bottom of each cup.
- Thread a pipe cleaner through for the stem.
- Arrange your flowers in a repurposed container.
Voila! You’ve got a garden that’ll never wilt. This egg-cellent craft teaches kids about recycling during nurturing their creativity. Watch their faces light up as they create a colorful masterpiece!
Toilet Paper Roll Fall Trees
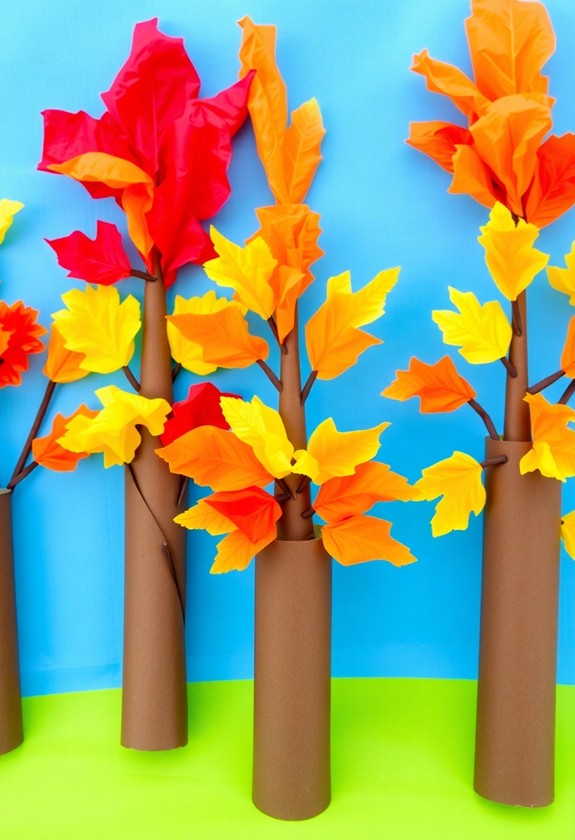
As the seasons change, so do our crafts! Get ready to turn those empty toilet paper rolls into adorable fall trees! This eco-friendly project is perfect for little hands and big imaginations. Using non-toxic materials guarantees a safe and enjoyable experience for your preschoolers as they discover their creativity.
Here’s what you’ll need:
- Toilet paper rolls
- Paint (brown, orange, red, yellow)
- Scissors
- Glue
Let’s get crafty:
- Paint the toilet paper roll brown for the tree trunk.
- As it dries, cut leaf shapes from colored paper.
- Glue the leaves to the top of the roll.
- Add some sparkle with glitter glue if you’re feeling fancy!
These charming trees will have your preschoolers falling in love with autumn! They’re not just cute – they’re a great way to talk about changing seasons and colors. Plus, you’re giving new life to something that would’ve been tossed out. How tree-mendous is that?!
Plastic Bottle Winter Snowmen
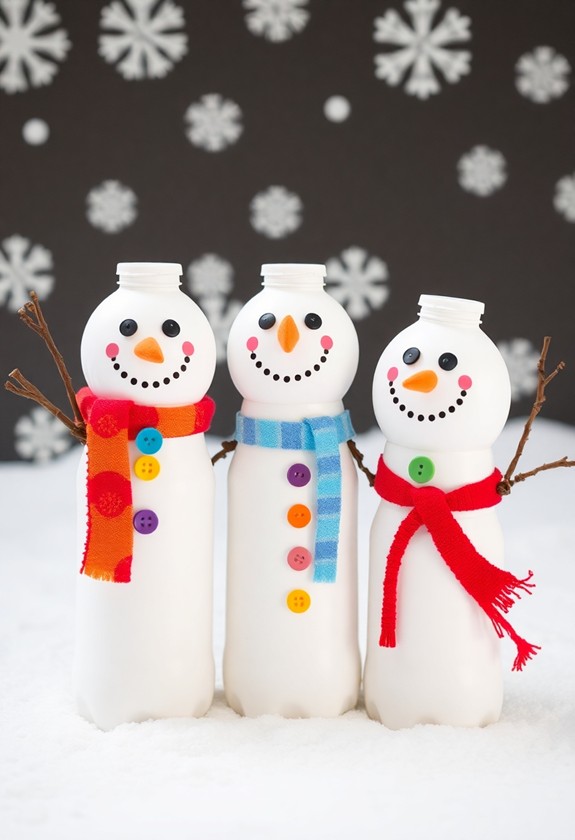
Winter’s chill brings the perfect opportunity to transform plastic bottles into adorable snowmen. It’s a fun, eco-friendly craft that’ll have your preschoolers giggling with glee! You’ll need clean plastic bottles, white paint, and some crafty accessories. This activity promotes fine motor skills and encourages creative expression as you use recyclable materials. Let’s get started!
- Paint the bottles white and let them dry
- Add button eyes and a carrot nose
- Wrap a tiny scarf around the “neck”
- Glue on twiggy arms for a frosty hug
- Top it off with a cute paper hat
Voila! You’ve got a jolly plastic bottle snowman! But why stop there? Create a whole snowy family! These frosty friends are perfect for decorating the classroom or sending home as winter keepsakes. And the best part? You’re teaching kids about recycling as they’re having a blast! So, gather those bottles and let the snow-crafting begin!
Newspaper Summer Beach Scene

Summer’s here, and it’s time to bring the beach into your classroom with a fun newspaper craft! Get ready to make a splash with this creative project that’ll have your preschoolers “shore” excited!
Here’s what you’ll need:
- Old newspapers
- Blue and yellow construction paper
- Glue
- Scissors
- Crayons or markers
Start by creating a sandy beach with torn newspaper strips. Glue them onto the bottom of your blue “ocean” background. Next, let’s add some beachy details:
- Cut out sun shapes from yellow paper
- Draw and cut out colorful beach umbrellas
- Make newspaper “seashells” by rolling small pieces
Don’t forget to add some waves! Use white crayons to draw curvy lines on the blue paper. Your little artists will have a “whale” of a time creating their own sunny seaside scenes!
Cardboard Box Autumn Leaf Collage

Fall’s crisp air and colorful leaves are perfect inspiration for our next recycled craft project. Let’s create a stunning autumn leaf collage using an old cardboard box! This fun activity will have preschoolers discovering textures and colors as they develop their fine motor skills.
Here’s what you’ll need:
- A flattened cardboard box
- Colorful autumn leaves (real or artificial)
- Glue
- Scissors
- Paint (optional)
First, cut your cardboard into a leaf shape. Now, it’s time to get creative! Arrange the leaves on the cardboard, mixing colors and sizes for a lively display. Glue them down securely. For extra pizzazz, paint the edges of your cardboard leaf gold or orange. Voila! You’ve leaf-t your mark on autumn art. Hang your masterpiece proudly and watch as it brings fall’s beauty indoors!
Paper Plate Spring Rain Cloud
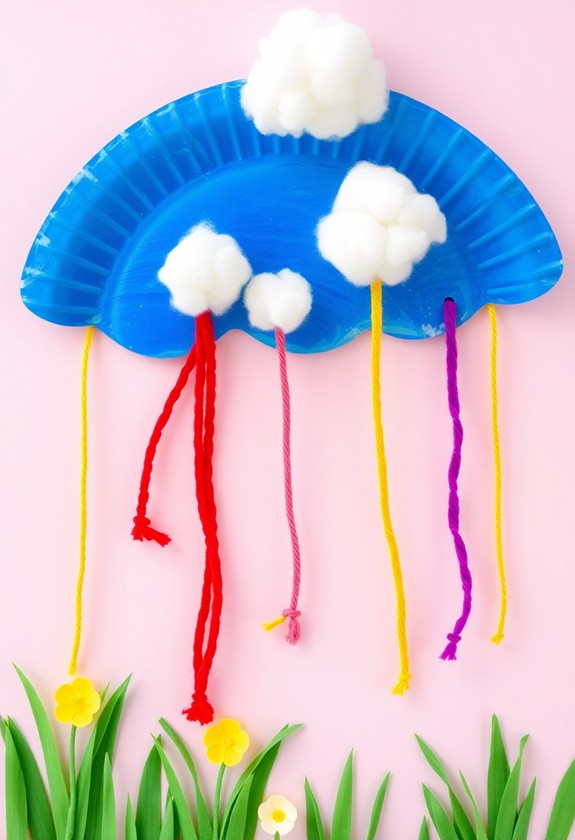
Spring showers bring May flowers, and they also inspire our next recycled craft project. Get ready to create a charming paper plate rain cloud that’ll brighten any rainy day!
Here’s what you’ll need:
- Paper plate
- Blue and white paint
- Cotton balls
- Colored paper strips
- Glue
- Scissors
Let’s get crafting:
- Paint the plate blue and let it dry.
- Glue cotton balls on top to form a fluffy cloud.
- Cut colorful paper strips for raindrops.
- Stick the “raindrops” to the bottom of the plate.
Voila! You’ve got a fanciful rain cloud that’s guaranteed to make a splash! This craft is perfect for teaching little ones about weather during a ton of fun. And the best part? You’re recycling materials and creating art at the same time. It’s raining creativity!
Milk Jug Winter Igloo
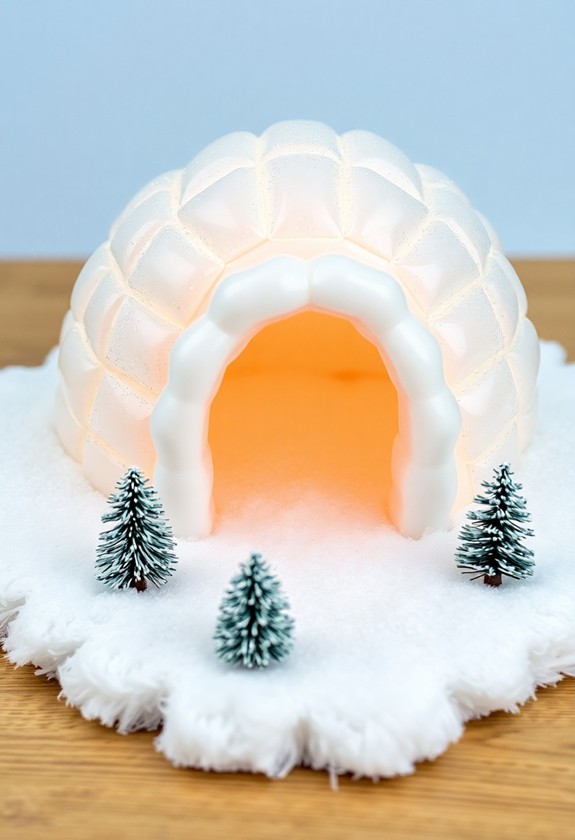
Winter’s chill brings the perfect opportunity to craft a cozy milk jug igloo. Gather clean, empty milk jugs and get ready for an arctic adventure! This fun project transforms recyclables into a winter wonderland. Here’s what you’ll need:
- White milk jugs (lots of them!)
- Scissors
- Hot glue gun (adult supervision required)
- White paint (optional)
- Cotton balls for snow effect
Start by cutting off the bottoms of the jugs. Then, arrange them in a circular pattern, building up and inward. Use the hot glue to secure each jug in place. As you stack, the igloo will take shape! For extra flair, paint the outside white or add cotton ball “snow.” Your little ones will love crawling into their very own igloo – it’s the coolest recycled craft ever!
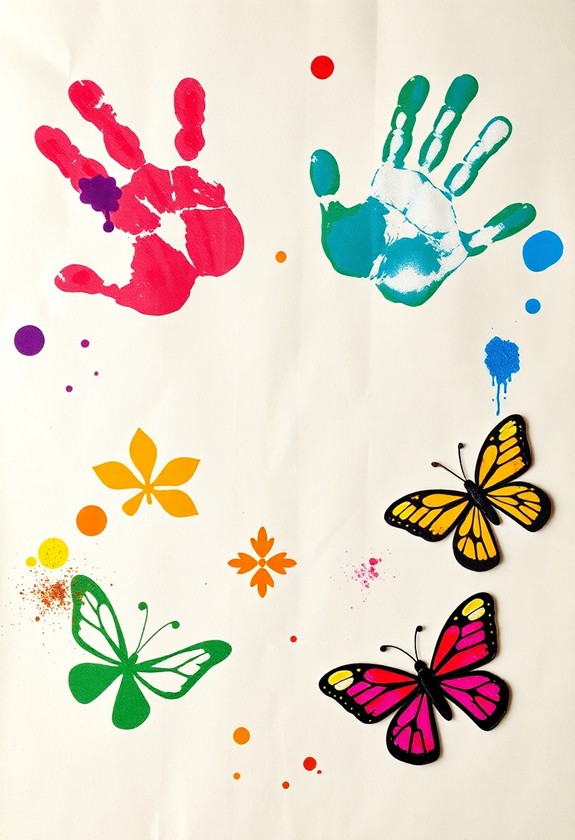
Magazine Summer Butterfly Mosaic

How can you bring the lively colors of summer to life with recycled materials? Create a stunning butterfly mosaic using old magazines! It’s a fun, eco-friendly project that’ll make your preschoolers flutter with excitement!
Here’s what you’ll need:
- Colorful magazine pages
- Scissors
- Glue
- Butterfly template
- Cardboard
Steps:
- Cut magazine pages into small squares
- Draw a butterfly outline on cardboard
- Let kids glue squares onto the outline
Watch as your little artists transform trash into treasure! They’ll love sorting through the radiant hues and piecing together their unique butterflies. This craft isn’t just beautiful—it teaches color recognition, fine motor skills, and environmental awareness. Plus, it’s a great way to recycle those old magazines cluttering up your home. Get ready for a wing-derful summer art session!
Tin Can Fall Luminary
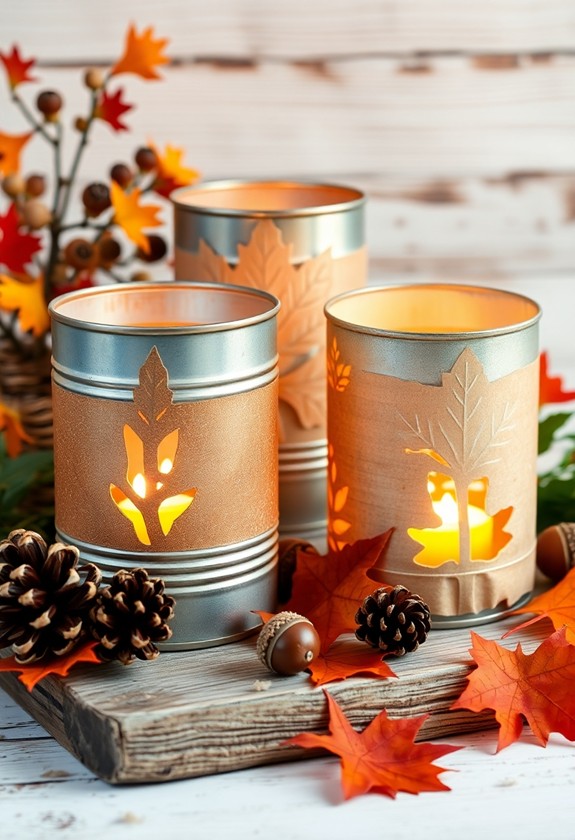
As summer fades into autumn, we can transform our crafting focus to capture the cozy glow of fall. Let’s create a charming tin can fall luminary! This easy project turns an ordinary can into a magical light source. You’ll need:
- Clean tin can
- Hammer and nail
- Tea light candle
- Fall-themed stencil
- Spray paint (orange, red, or gold)
First, punch holes in the can using the nail and hammer to create your design. Be careful with those little fingers! Next, spray paint the can in your chosen autumn hue. Once dry, place a tea light inside and watch it shine! The flickering light will cast enchanting shadows, bringing a warm ambiance to any room. It’s like fall magic in a can! Your preschoolers will love this illuminating craft.
Cereal Box Spring Garden Fence
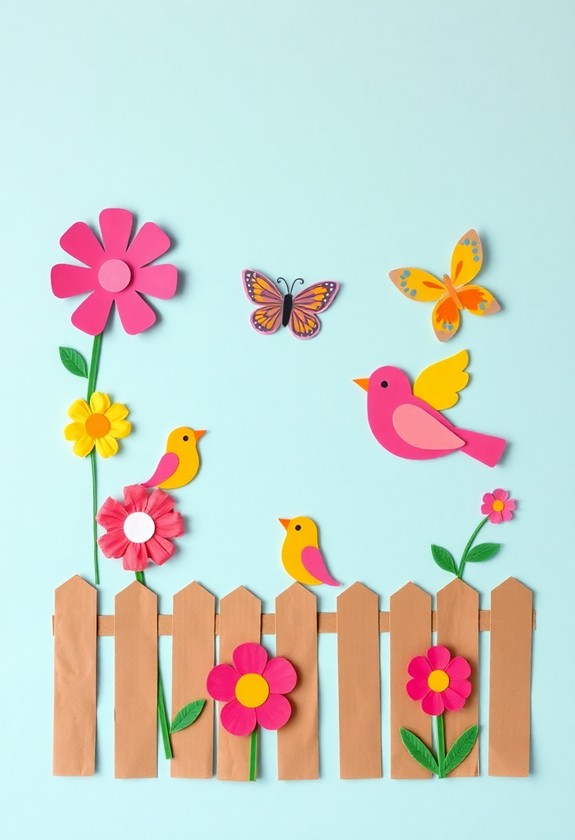
With spring in full bloom, it’s time to create a charming garden fence using empty cereal boxes. This craft is perfect for little hands and big imaginations! Here’s what you’ll need:
- Empty cereal boxes
- Scissors
- Paint and brushes
- Glue
- Decorations (stickers, sequins, etc.)
First, cut the cereal boxes into fence-shaped pieces. Paint them in bright, springy colors – think grass green, sky blue, or sunny yellow! Once dry, it’s time to decorate. Add flower stickers, glue on sequins for dewdrops, or draw cute bugs crawling along the fence. Get creative!
Curious Little Questions
How Can I Ensure the Recycled Materials Are Safe for Preschoolers?
Safety first, crafty friends! To guarantee your recycled materials are preschooler-proof:
- Clean thoroughly! Wash and disinfect everything.
- Smooth those edges! Sand down any sharp bits.
- Size matters! Avoid small pieces that could be swallowed.
- No chemicals, please! Steer clear of materials with harmful residues.
- Supervise always! Keep a watchful eye during crafting.
- When in doubt, throw it out! Better safe than sorry.
What Age Group Are These Crafts Most Suitable For?
These crafts are perfect for preschoolers, typically ages 3-5! But don’t worry, they’re versatile enough for younger toddlers and older kids too. You’ll find that 4-year-olds often hit the sweet spot, with their growing dexterity and boundless creativity. Remember, every child develops differently, so you might need to adjust based on individual skills. The key is to keep it fun and engaging! Younger ones might need more help, whereas older kids can tackle trickier tasks. Let’s get crafting!
How Long Does Each Craft Project Typically Take to Complete?
Crafty kids, check this out! You’ll be thrilled to know that these terrific projects typically take about 15-30 minutes to complete. But here’s the fun part: it hinges on how creative you get! Some speedy sculptors might finish faster, whereas detail-loving designers could take longer. And guess what? That’s totally okay! Remember, it’s not a race. Take your time, enjoy the process, and let your imagination soar. You’ll be amazed at what you can create in such a short time!
Are There Any Alternative Materials for Those With Allergies?
Don’t let allergies stop the fun! You’ve got tons of allergy-friendly options for your crafts. Try these awesome alternatives:
- Swap out paper for fabric scraps
- Use popsicle sticks instead of natural wood
- Go for plastic bottle caps over metal ones
- Choose synthetic pom-poms over wool
- Pick foam sheets instead of felt
And remember, always check with parents about specific allergies. With these swaps, you’ll keep everyone safe and still create amazing art. Let’s get crafting!
How Can I Incorporate Educational Elements Into These Seasonal Art Projects?
Who needs education when you can just finger-paint all day, right? Just kidding! You can totally sneak some learning into your art projects, and it’s as easy as pie! Here’s how:
- Count shapes or colors as you create
- Practice spelling with letter-themed crafts
- Learn about seasons as you make nature-inspired art
- Investigate simple science concepts like mixing colors