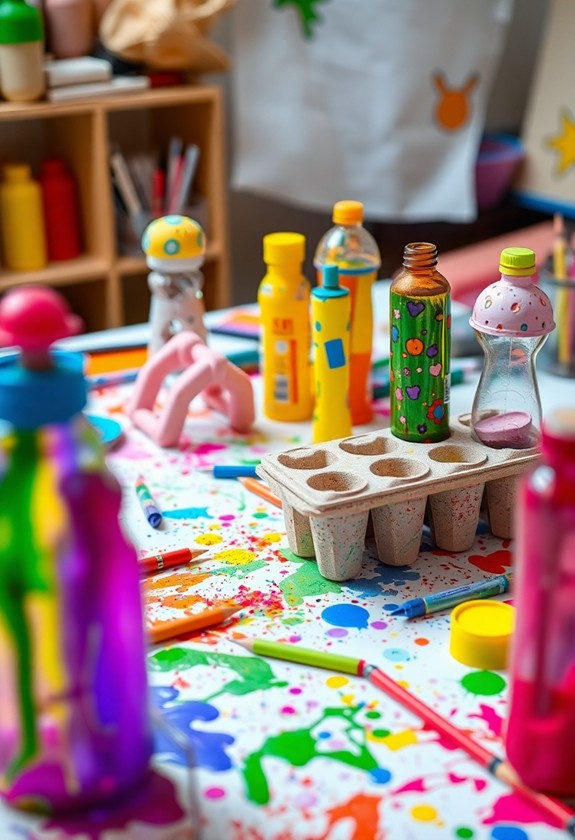
Get ready to transform ordinary bottles into extraordinary art! Your little ones will love creating colorful bottle shakers, miniature terrariums, and adorable animal sculptures. They can stamp masterpieces with bottle caps, design glittery vases, and even build rocket ships! For green thumbs, try bottle flower gardens or windchimes. And don't forget the piggy banks – a fun way to teach savings! These projects aren't just creative, they're eco-friendly too. Plus, they're perfect for developing fine motor skills and releasing imagination. So grab those empty bottles and let the crafting begin! There's a whole world of bottle art waiting to be discovered!
Creative Highlights
- Create bottle animal sculptures using plastic bottles, paint, and decorative materials to enhance creativity and fine motor skills.
- Make colorful bottle shakers by filling plastic bottles with beads or small objects and decorating the exterior.
- Design sensory bottles with water, glitter, and food coloring for a calming visual experience.
- Craft miniature terrariums in small bottles using pebbles, soil, and tiny plants to teach about ecosystems.
- Transform bottles into piggy banks by painting and adding features, promoting saving habits and creativity.
Colorful Bottle Shakers
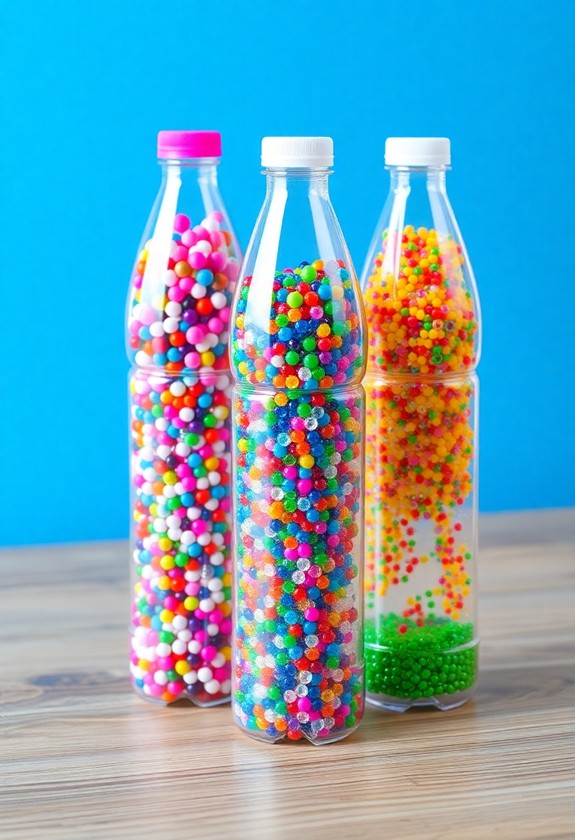
During repurposing empty plastic bottles, you can create fun and lively shakers that'll delight kids of all ages. It's a super easy project that's perfect for little hands! First, grab some clean, dry bottles and remove the labels. Now comes the fun part: filling them up! This activity promotes fine motor skills and encourages creativity, much like the Horizon Group USA Bluey Aqua Art set.
Materials you'll need:
- Plastic bottles
- Colorful beads, sequins, or small craft items
- Glitter (optional)
- Strong glue
- Decorative tape or paint
Pour in your chosen fillers – mix and match for different sounds and looks. Experiment with rice, beans, or even small bells for a jingle-jangle effect! Secure the lid tightly with glue to prevent spills. And voila! You've got a basic shaker.
But wait, there's more! Jazz up your bottles by wrapping them in colorful tape or painting funky designs. Why not add googly eyes for some silly faces? Or turn them into animals with foam shapes? The possibilities are endless!
These bottle shakers aren't just fun to make – they're a blast to play with, too! Shake, rattle, and roll to create your own rhythms. It's music to your ears!
Miniature Bottle Terrariums
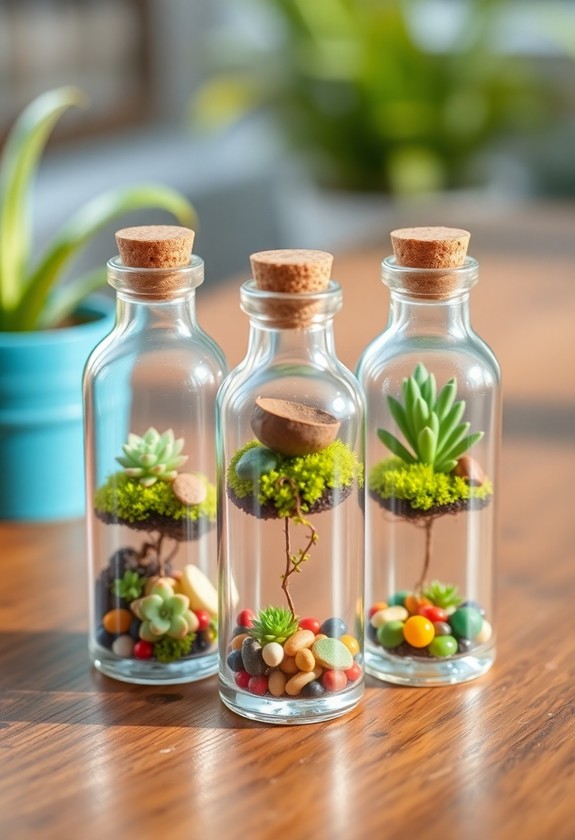
From shaking to growing, let's explore another creative way to repurpose plastic bottles. Get ready to bring a tiny world to life with miniature bottle terrariums! These pint-sized ecosystems are not only adorable but incredibly fun to make. Creating terrariums offers multi-sensory experiences that aid in memory retention and information processing, essential for early childhood development.
First, grab a clean, clear plastic bottle and cut off the top. Now, you're all set to create your miniature garden! Here's what you'll need:
- Small pebbles or gravel for drainage
- Activated charcoal to keep things fresh
- Potting soil for your plants to grow in
- Tiny plants or moss to bring your terrarium to life
Layer these materials in your bottle, starting with pebbles at the bottom. Add a thin layer of charcoal, then fill it about halfway with soil. Now comes the fun part – planting! Use tweezers to carefully place your mini plants or moss in the soil. Don't forget to water them lightly!
Your bottle terrarium is a little slice of nature you can keep on your desk or windowsill. It's like having a "plant-astic" pet that's easy to care for! Watch your mini-world grow and thrive. How cool is that?
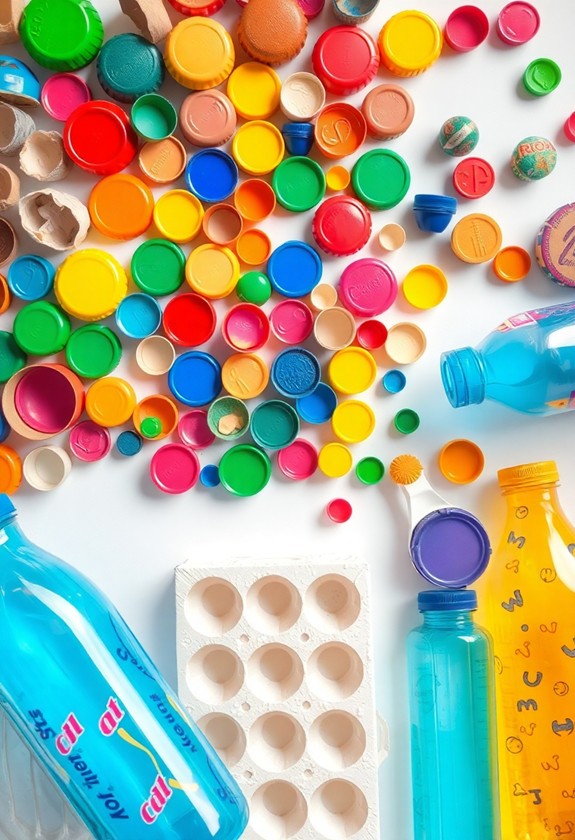
Bottle Cap Stamping Art
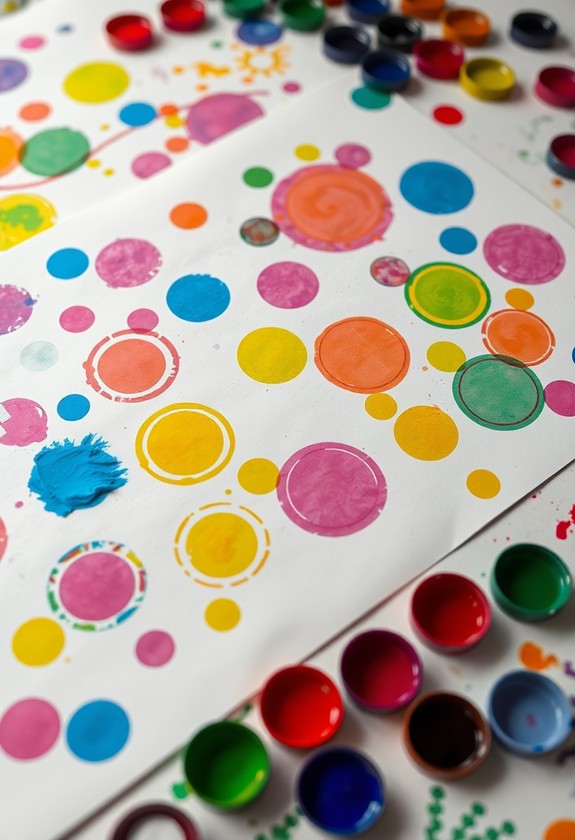
Let's plunge into our next bottle-inspired craft: bottle cap stamping art! This fun activity turns ordinary bottle caps into amazing stamping tools. You'll be amazed at the cool designs you can create! This project enhances fine motor skills and encourages creative expression, making it perfect for toddlers and grandparents to enjoy together.
What you'll need:
- Clean bottle caps
- Paint (tempera or acrylic)
- Paper or fabric
- Paintbrushes
- Paper plates for paint
How to do it:
- Gather your caps: Collect different sizes and shapes for variety.
- Prep your workspace: Cover it with newspaper to avoid messes.
- Pour paint: Put small amounts on paper plates.
- Dip and stamp: Press the cap into paint, then onto your paper or fabric.
- Experiment: Try twisting the cap or using multiple colors for cool effects!
Get creative! Make patterns, sceneries, or even abstract art. The possibilities are endless! Why not create greeting cards or personalized wrapping paper? Your bottlecap masterpieces will be totally unique!
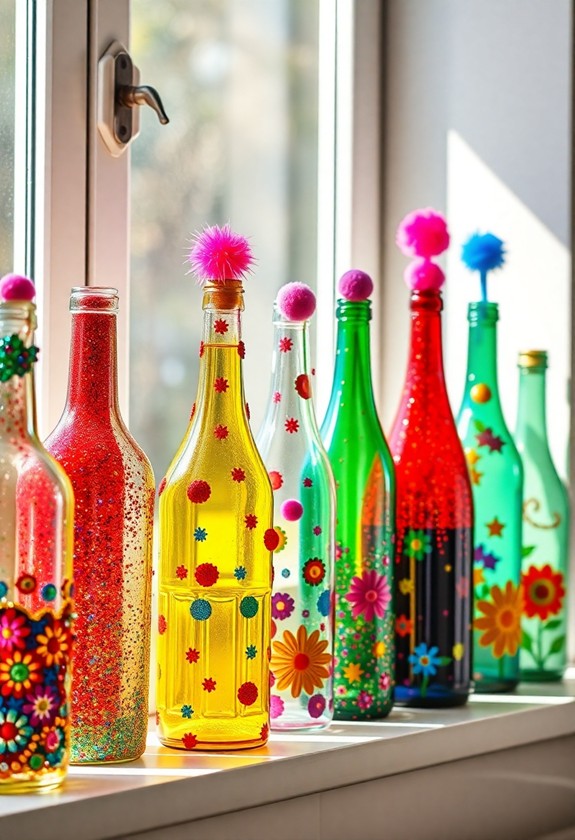
Glittery Bottle Vases
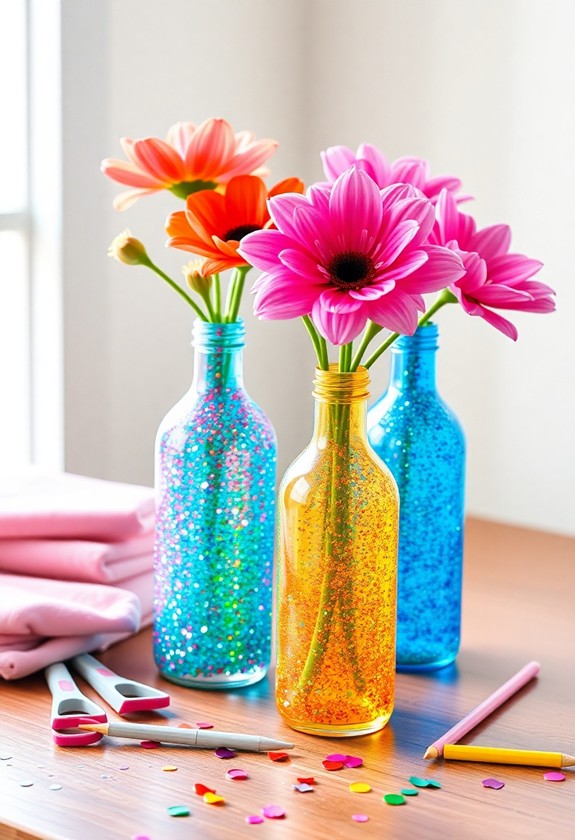
Transform ordinary bottles into dazzling decorative vases with this glittery craft project. It's time to add some sparkle to your recycling! Grab those empty glass bottles and get ready for a glittery adventure. This fun, easy project will turn trash into treasure in no time! Mess-free crafting is ideal for toddlers, and this activity fits the bill perfectly as it promotes fine motor skills and color recognition.
Here's what you'll need:
- Clean, dry glass bottles
- Mod Podge or white glue
- Fine glitter in various colors
- Paintbrushes
Let's get started! First, ensure your bottles are squeaky clean. Then, brush a thin layer of Mod Podge or glue onto the outside. Sprinkle glitter all over the wet surface – don't be shy, pile it on! Shake off the excess and let it dry. For a super sparkly effect, add another layer of glue and glitter. Mix colors for a rainbow effect or stick to one hue for a dazzling monochrome look.
Once your glittery masterpiece is dry, it's ready to shine! Use your new vase to display flowers, pencils, or just as a standalone piece of art. Watch as it catches the light and sparkles like a disco ball! Who knew recycling could be so glamorous?
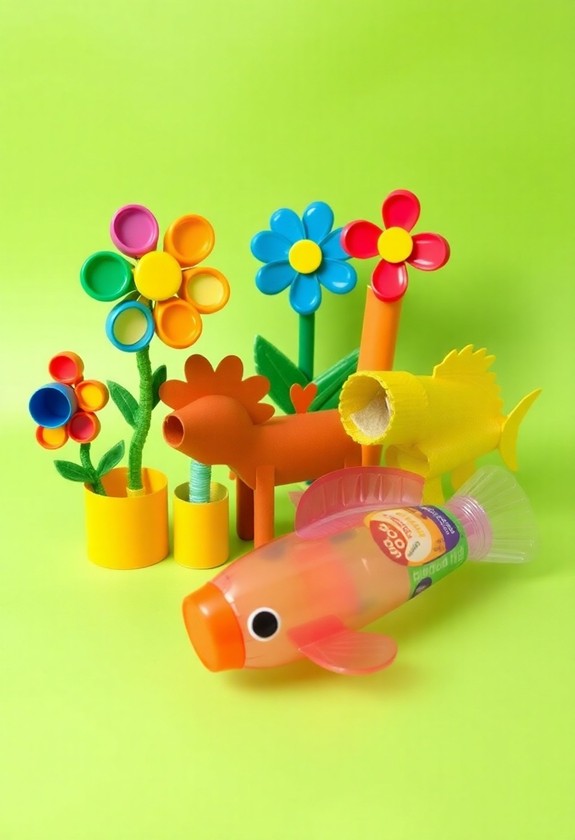
Bottle Animal Sculptures
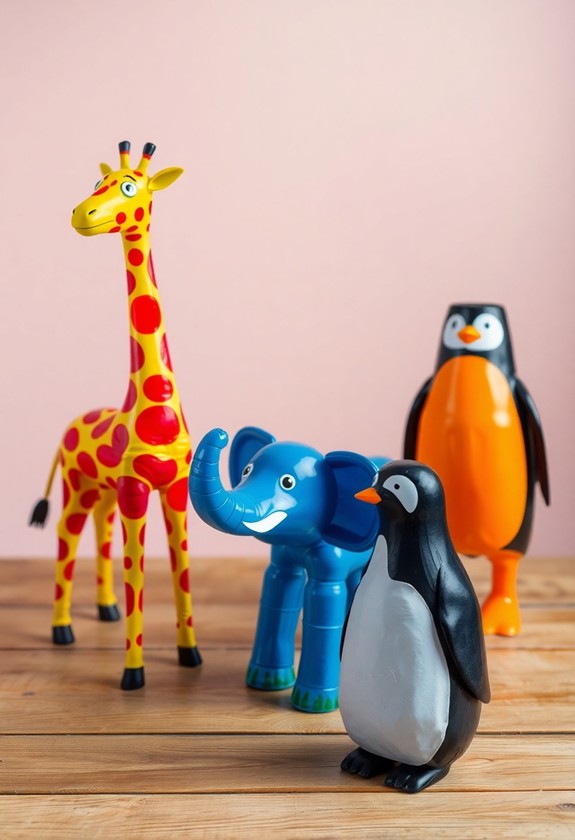
Imagination soars with bottle animal sculptures, turning everyday recyclables into a menagerie of plastic pets. You'll love creating these adorable creatures from simple materials! Let's plunge into this fun-tastic project! This activity not only improves creativity and development but also promotes fine motor skills in toddlers.
Gather Your Supplies:
- Clean plastic bottles (various sizes)
- Scissors
- Paint and brushes
- Googly eyes
- Pipe cleaners
- Glue
Time to Create:
- Choose your animal! A giraffe? An elephant? The sky's the limit!
- Cut your bottle to shape. For a turtle, leave the bottom intact as the shell.
- Paint your creation with lively colors. Let your creativity run wild!
- Add details like eyes, legs, and tails using pipe cleaners and googly eyes.
- Let your new friend dry completely.
Voila! You've got a bottle-icious buddy! These eco-friendly pals are purr-fect for playtime or as unique decorations. And the best part? You're helping the planet by upcycling!
Pro tip: Mix and match different bottle sizes to create a whole zoo of bottle buddies. Why not make a family of bears or a pride of lions? The possibilities are end-less!
Sensory Bottle Creations
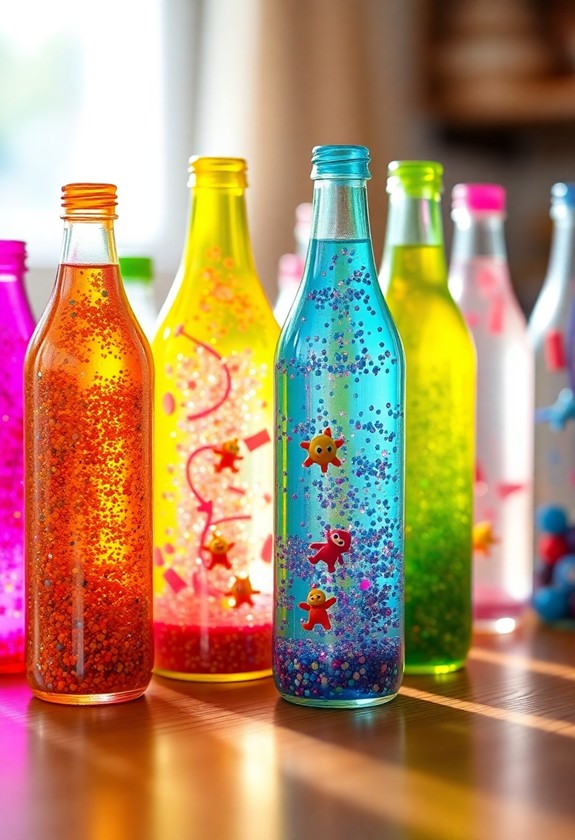
Sensory bottles burst onto the scene as enchanting tools for both play and relaxation. They're a feast for the eyes and a calming influence on busy minds! Creating these mesmerizing bottles is super easy and oh-so-fun. You'll love watching the swirling contents twirl and shimmer inside your very own bottle masterpiece!
Ready to plunge into this activity? Here's what you'll need to get started:
- Clear plastic bottles with tight-fitting lids
- Water or clear hair gel
- Glitter, sequins, or small colorful objects
- Food coloring or liquid watercolors
Let's get crafting! First, fill your bottle about 3/4 full with water or hair gel. Then, add a few drops of food coloring – go wild with your favorite hues! Next, toss in a handful of glitter or other sparkly bits. Finally, screw the lid on tight and give it a good shake. Voila! You've just created a magical, swirling world in a bottle!
But wait, there's more! Why not try a themed sensory bottle? Create an ocean scene with blue water and tiny shells, or a galaxy bottle with dark colors and star-shaped confetti. The possibilities are as endless as your imagination!
Bottle Flower Garden
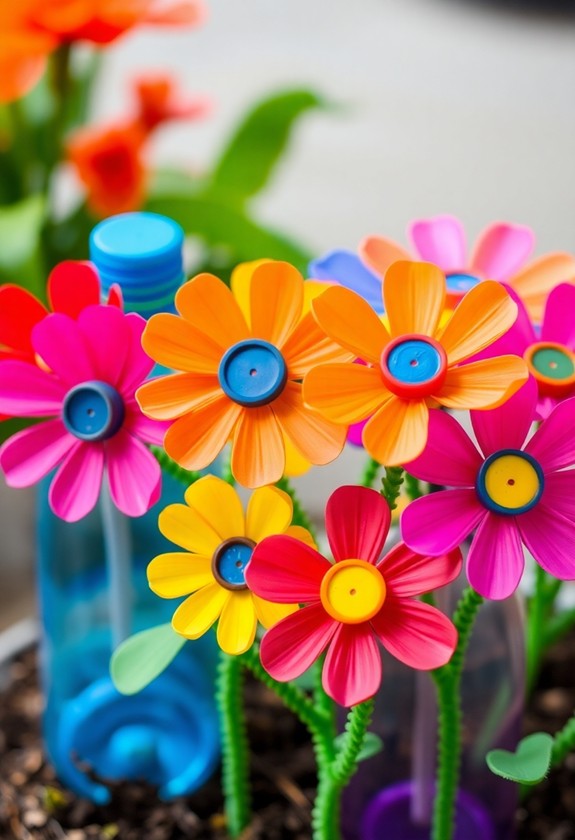
A lively bottle flower garden brings the beauty of nature indoors, using recycled materials. It's a blooming awesome project that'll have kids giggling with delight! Ready to get your hands dirty? Let's plunge into it!
Materials you'll need:
- Clean plastic bottles
- Scissors
- Acrylic paint
- Paintbrushes
- Potting soil
- Seeds or small plants
- Decorative items (optional)
Steps:
- Cut the bottles in half, keeping the bottom parts.
- Paint the bottle bottoms with vivid colors. Go wild!
- Once dry, add some drainage holes. Poke, poke, poke!
- Fill your bottles with potting soil. Don't be afraid to get messy!
- Plant your seeds or small plants. Green thumbs up!
- Water your mini gardens and watch them grow!
But wait, there's more! Why not add some pizzazz? Glue on googly eyes, create bottle cap flowers, or add tiny figurines. Your imagination's the limit!
This project's not just fun, it's eco-friendly too. You're giving those bottles a new lease on life! So, gather your supplies and get ready to create a bottle-tastic flower garden that'll make everyone green with envy!
Bottle Piggy Banks
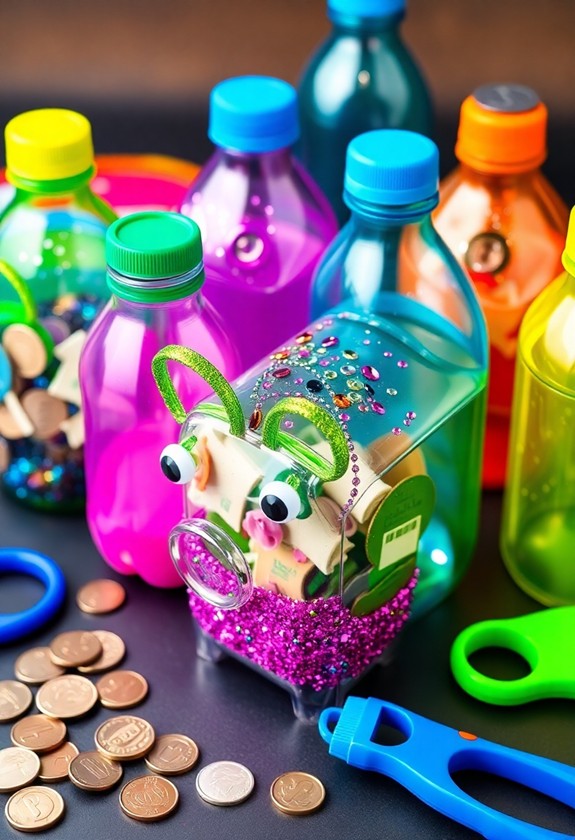
Oink-credible savings start with bottle piggy banks! You'll love turning ordinary plastic bottles into cute, coin-collecting piggies. It's a fun way to teach kids about saving money as you get creative. Let's plunge into this piggy-tastic project!
What you'll need:
- Clean plastic bottles (any size works!)
- Pink paint and brushes
- Craft foam or felt for ears and snout
- Googly eyes and pipe cleaners
First, paint your bottle pink and let it dry. As you're waiting, cut out pig ears and a snout from foam or felt. Once the paint's dry, glue on those adorable piggy features. Don't forget the googly eyes for extra cuteness! For the final touch, twist a pipe cleaner into a curly tail.
Now, here's the money-saving magic: Cut a coin slot in the bottle cap. Screw it back on, and voila! Your piggy bank is ready to gobble up loose change. Kids will love feeding their new pig-pal and watching their savings grow. It's a win-win for creativity and financial smarts!
Bottle Rocket Ships
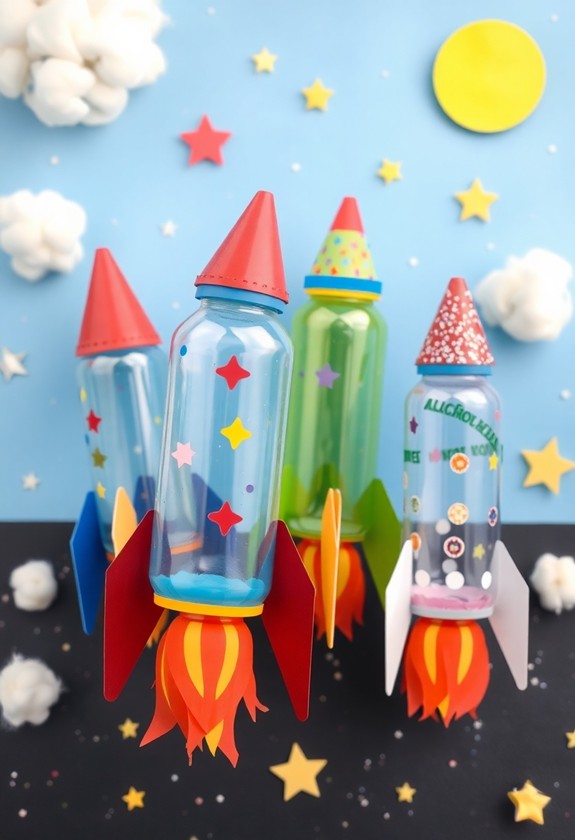
Blast off into creativity with bottle rocket ships! These galactic crafts are out of this world and super easy to make. You'll need a clean plastic bottle, construction paper, scissors, glue, and markers. Let's get started on your cosmic creation!
Step 1: Cut the bottom off your bottle. This will be the nose of your rocket!
Step 2: Wrap colorful paper around the bottle. Boom! You've got a rocket body.
Step 3: Cut out fins from paper and glue them to the sides. Your ship is taking shape!
Step 4: Create a pointy cone for the top using paper. Attach it to the bottle's neck.
Step 5: Decorate! Draw windows, flames, or alien passengers. Let your imagination soar!
Step 6: Add stickers or glitter for extra pizzazz. Your rocket's ready for liftoff!
But wait, there's more! Why not create a whole fleet? Make big and small rockets, or design different planets for them to visit. You could even hang them from your ceiling for a stellar bedroom makeover. The sky's the limit with these bottle rocket ships!
Bottle Windchimes
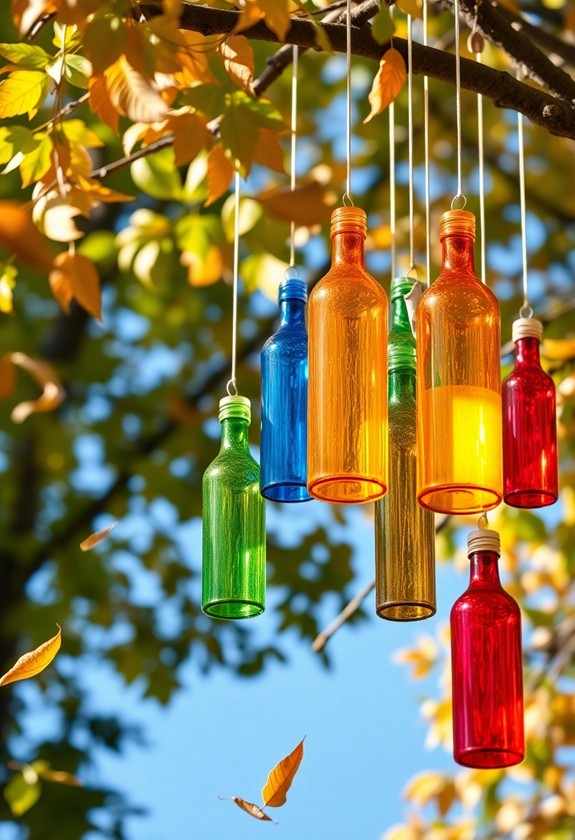
From bottles to beautiful music, windchimes are a delightful craft project that kids will love. It's time to turn those empty plastic bottles into melodious outdoor decorations! Grab your little artists and get ready for a fun-filled afternoon of crafting and creating.
What you'll need:
- Clean, empty plastic bottles
- Acrylic paint and brushes
- String or fishing line
- Small bells or beads
Start by washing and drying your bottles. Now, let your kids' imaginations run wild! They can paint the bottles in any colors or patterns they like. Stripes, polka dots, or even little faces – the sky's the limit! Once the paint is dry, it's time to string 'em up. Cut different lengths of string and tie them to the bottle necks. Add bells or beads to the ends for extra jingle-jangle!
Curious Little Questions
What Age Group Are These Bottle Art Projects Suitable For?
You might think bottle art is just for grown-ups, but think again! These fun projects are perfect for little hands, typically ages 3-10. Your preschoolers can start with simple designs, whereas older kids tackle more complex creations. It's all about creativity and mess-making! But don't worry, parents – you'll love watching their imaginations soar. So grab those empty bottles and get ready for some artsy fun! Remember, age is just a number regarding bottled-up creativity!
How Can I Ensure the Safety of Children During These Activities?
Safety first, fun second! You've got this! Always supervise your little artists, and make certain they're using child-safe materials. Keep scissors out of reach, and opt for non-toxic paints and glues. Don't forget to cover your workspace with newspapers or a plastic tablecloth. And hey, why not make it a team effort? Work together on tricky parts. Remember, a clean workspace is a safe workspace, so tidy up as you go. Let's create some bottle-icious art, safely and happily!
Are There Alternatives for Glass Bottles in These Projects?
You've got a world of options that'll blow your mind! Plastic bottles are your new best friend for these projects. They're lightweight, unbreakable, and come in all shapes and sizes. But wait, there's more! Try using cardboard tubes, tin cans, or even small wooden boxes. These alternatives are safer for little hands and just as fun to decorate. And here's a pro tip: empty yogurt containers make fantastic mini planters! Let your creativity soar with these kid-friendly choices!
Where Can I Find Eco-Friendly Materials for These Bottle Art Projects?
You've got so many eco-friendly options for your bottle art projects! Search no more than your own home—raid the recycling bin for plastic bottles and containers. Head to craft stores for bamboo, cork, or recycled paper products. Don't forget thrift shops, where you can find all sorts of reusable treasures! Online eco-stores are goldmines for sustainable crafting supplies. And nature's your best friend—collect leaves, twigs, and pebbles for natural embellishments. Get creative and have a blast during your kindness to the planet!
How Long Do These Bottle Art Projects Typically Take to Complete?
You might think these projects take forever, but don't worry! Most bottle art creations can be finished in just 30 minutes to an hour. It's quick and fun! The time depends on how complex your design is and how fast your little artists work. Some projects, like drying paint or glue, might need extra time. But hey, that's a great chance for a snack break! Remember, it's not a race – enjoy the creative process and have a blast!