Unleash your little adventurer's creativity with these affordable DIY art projects! From finger painting with edible ingredients to sidewalk chalk masterpieces, the possibilities are endless. Get messy with nature collages, or build amazing sculptures from recycled materials. Whip up some homemade play dough for sensory fun, or try bubble wrap printing for unique textures. Transform cardboard boxes into a mini art gallery, and don't forget about sponge painting adventures! These projects are perfect for developing fine motor skills, encouraging imagination, and having a blast with art. But wait, there's so much more to uncover in the world of DIY art for kids!
Creative Highlights
- Finger painting with edible ingredients like yogurt and food coloring offers safe, creative exploration for young children.
- Sponge painting and bubble wrap printing provide affordable, engaging textures for unique artistic experiences.
- Outdoor activities like sidewalk chalk art and nature collages encourage creativity while connecting children with their environment.
- Recycled material sculptures teach sustainability and promote imaginative repurposing of household items.
- Creating a cardboard box art gallery combines artistic expression with curation skills, offering a comprehensive creative experience.
Finger Painting With Edible Ingredients
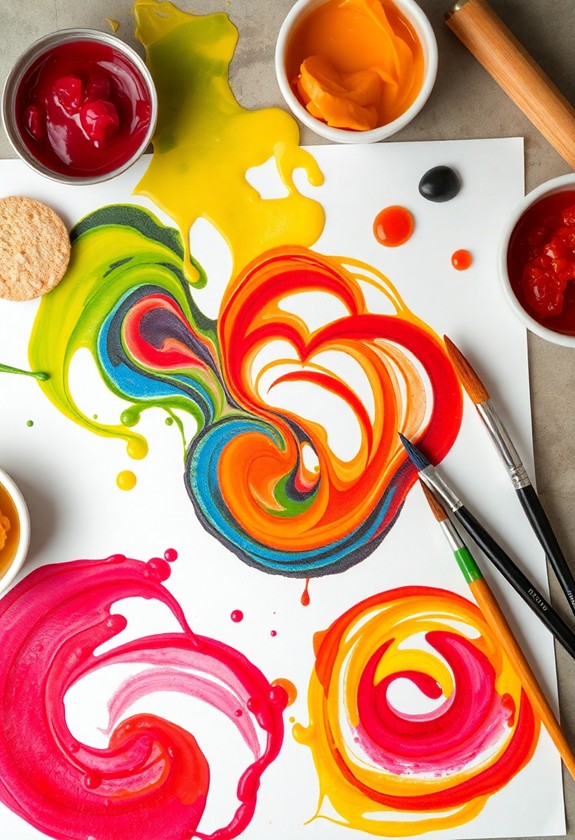
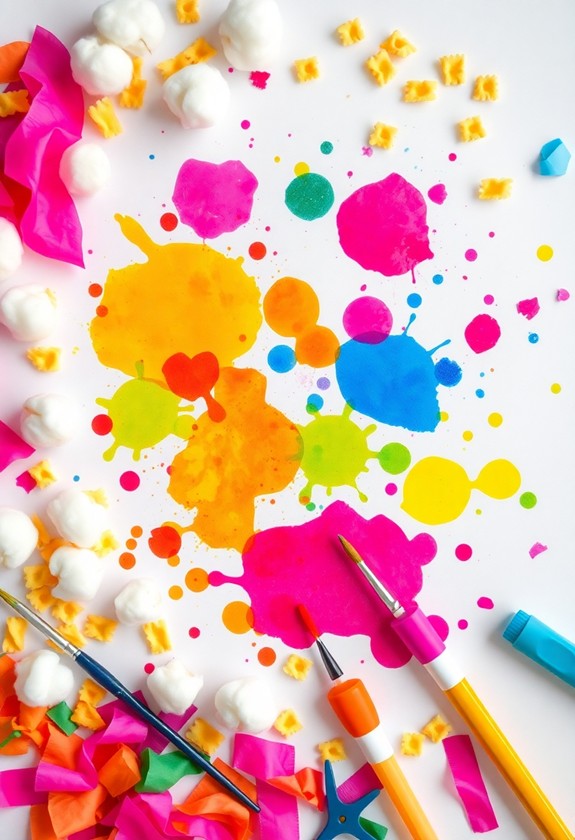
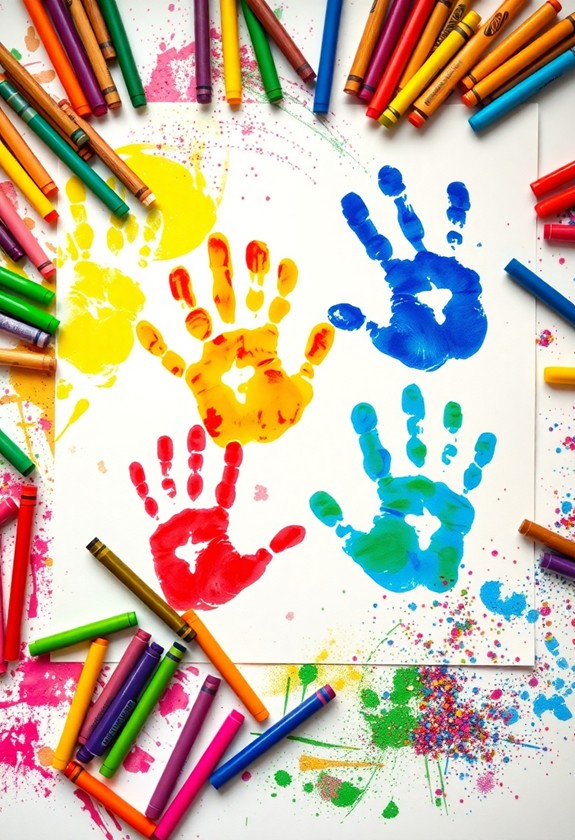
In view of safety concerns, finger painting with edible ingredients is a fantastic way to engage young children in art. It's messy, it's fun, and best of all, it's totally safe if they decide to taste their masterpiece! This activity not only encourages self-expression and creativity, but furthermore improves fine motor skills through hands-on artistic exploration.
What You'll Need:
- Plain yogurt
- Food coloring
- Large paper or cardboard
- Smocks or old t-shirts
Let's Get Painting!
First, suit up in your art clothes – things are about to get colorful! Mix different food colors into separate bowls of yogurt. Now, let your little Picassos loose! They can dip their fingers, hands, or even feet into the yogurt paint and create swirls, dots, and splashes on the paper. Encourage them to blend colors and make new shades. It's like magic!
But wait, there's more! Why not try printing with fruits and veggies? Cut an apple in half, dip it in the paint, and stamp away! Or use celery stalks as brushes. The possibilities are endless!
Sidewalk Chalk Masterpieces
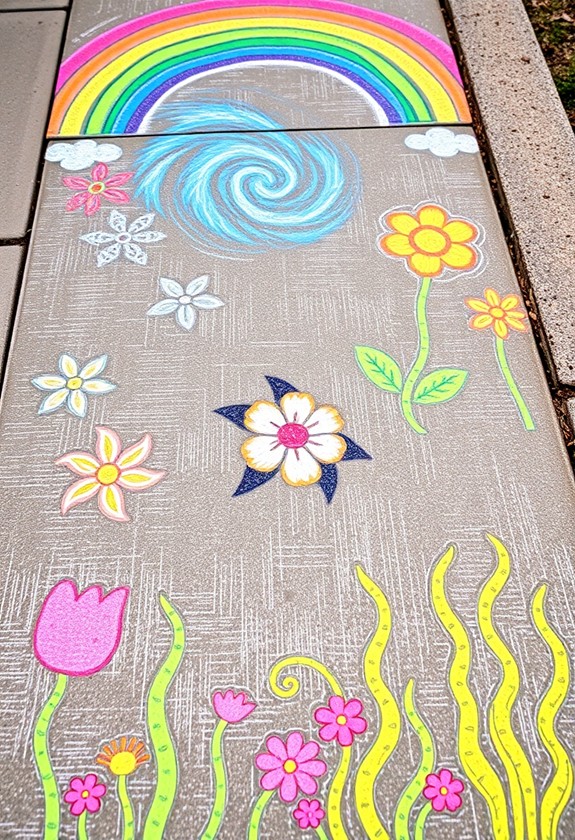
Bursting with color and creativity, sidewalk chalk masterpieces offer a fantastic way to take your kids' art outdoors. It's time to transform your driveway or sidewalk into a canvas for their imagination! These mess-free art projects are perfect for engaging toddlers during keeping cleanup to a minimum, making them ideal for summer fun.
Getting started:
First, grab a pack of chunky sidewalk chalk – the bigger, the better! Let your little artists choose their favorite colors. Now, encourage them to think big! They can draw enormous flowers, create a lifesize board game, or sketch out their own magical kingdom.
Fun techniques to try:
- Wet the chalk for lively, paint-like strokes
- Use stencils for perfect shapes
- Create 3D effects with shading
- Mix chalk dust with water for "chalk paint"
Make it interactive:
Why not turn their art into a game? Draw a hopscotch board, create a maze, or design a twisty race track for toy cars. The possibilities are endless!
Nature Collage Adventure
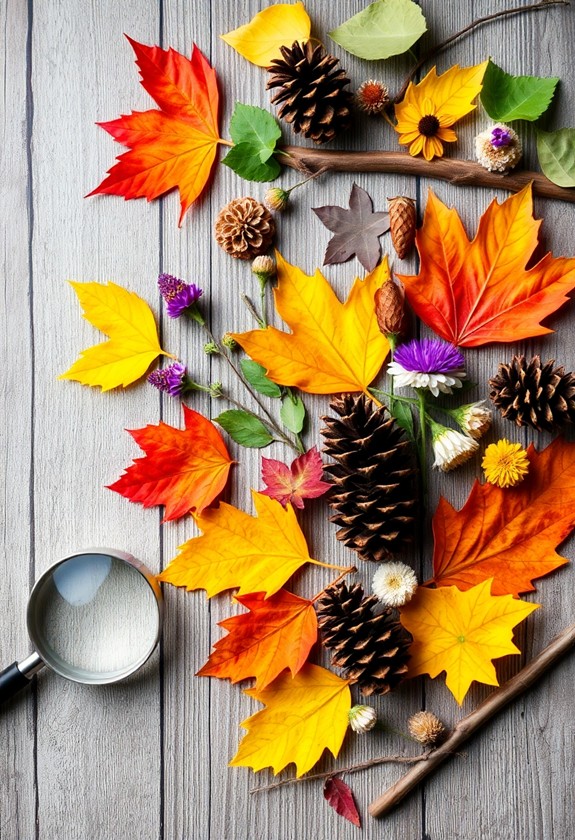
After uncovering the lively world of sidewalk art, let's venture into the great outdoors for our next creative endeavor. It's time for a Nature Collage Adventure! This project will have you investigating your backyard or local park, collecting natural treasures, and turning them into a beautiful work of art. This activity not only fosters creativity but also improves fine motor skills and promotes a connection with nature, making it an ideal craft for young adventurers.
What you'll need:
- A sturdy piece of cardboard or canvas
- Glue
- Natural materials (leaves, twigs, flowers, pebbles, etc.)
First, grab your collection basket and head outside. Look high and low for interesting items – the more variety, the better! Once you've gathered your nature goodies, it's time to get creative. Arrange your findings on the cardboard, creating patterns or even a scenic view. When you're happy with your design, glue everything in place.
And voila! You've just created a one-of-a-kind nature collage. But wait, there's more! Why not challenge yourself to make a new collage for each season? You'll be amazed at how different your creations look as the world around you changes. So, get out there and start collecting – your next masterpiece awaits!
Recycled Material Sculptures
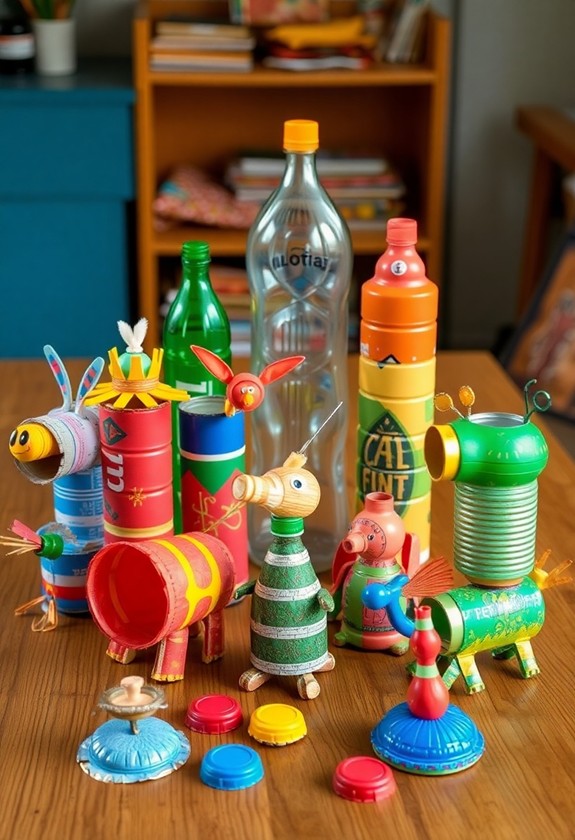
From trash to treasure, recycled material sculptures offer a fantastic way to teach kids about sustainability while nurturing their creativity. It's time to explore the world of upcycling and turn ordinary household items into extraordinary art! Enhancing brain development through creative engagement cultivates neural connections essential for language and spatial awareness. Regular crafting likewise stimulates brain regions associated with problem-solving and motor skills.
Gather Your Materials:
Look around your home for recyclables like cardboard boxes, plastic bottles, egg cartons, and bottle caps. Don't forget about old magazines, buttons, and fabric scraps too!
Let the Creativity Flow:
Encourage your little artists to imagine wild and wacky sculptures. A robot made from tin cans? A fantastical creature from cardboard tubes? The sky's the limit!
Get Crafty:
Use safe scissors to cut materials, and try different adhesives like glue, tape, or string to connect pieces. Paint your creations for an extra pop of color!
Make It Interactive:
Why not add moving parts? Create a cardboard mouse with a wheel that spins, or a bottle-cap caterpillar that wiggles!
Display and Discuss:
Once finished, showcase your recycled masterpieces! Talk about how you've given new life to old items. It's not just art – it's eco-friendly fun!
Homemade Play Dough Creations
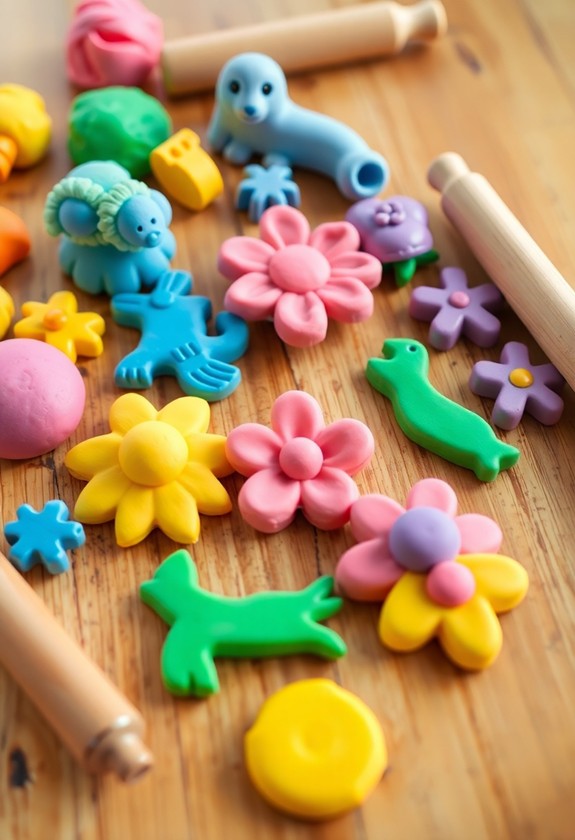
Homemade play dough offers a sensory adventure that's both fun and educational for kids. It's easy to make, and you'll have a blast creating it with your little ones! Here's how to whip up a batch:
Ingredients:
- 2 cups flour
- 1 cup salt
- 2 tablespoons oil
- 1.5 cups warm water
- Food coloring
Instructions:
- Mix dry ingredients in a bowl.
- Add oil and water, stirring until combined.
- Knead the dough until smooth. Add food coloring for pizzazz!
Now, let the creativity flow! Encourage your kids to sculpt animals, monsters, or anything their imaginations conjure up. They can use cookie cutters, rolling pins, or even plastic utensils to shape their creations. And don't forget to name their doughy friends! This activity promotes fine motor skills and imaginative play, similar to the benefits provided by the Magic Water Elf Toy Kits.
But wait, there's more! Turn playtime into learning time by practicing numbers and letters. Or, create a mini garden with play dough flowers and trees. The possibilities are endless!
Bubble Wrap Printing Fun
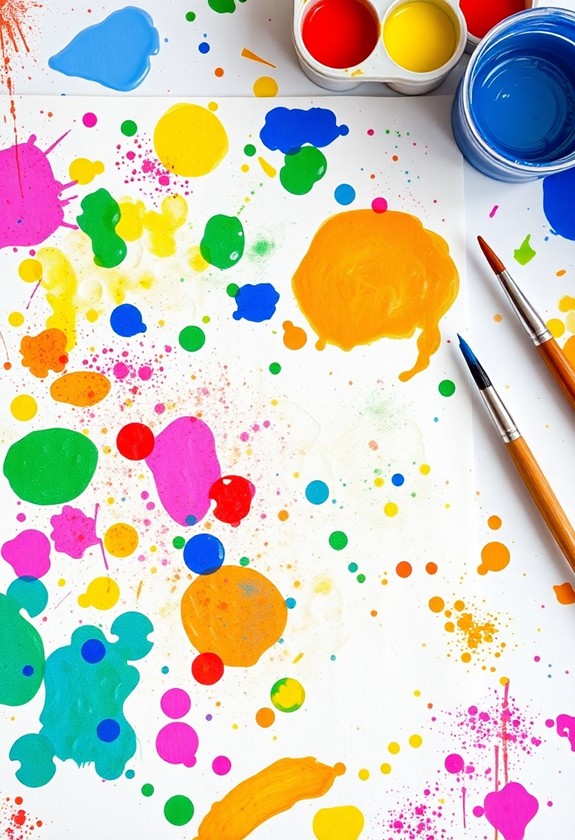
Creativity bubbles up with this fun and simple printing technique that transforms ordinary packaging material into a unique art tool. Get ready to pop with excitement as you plunge into bubble wrap printing!
First, gather your supplies: bubble wrap, paint, paper, and a rolling pin. Cut the bubble wrap to fit your paper size. Now, let's get colorful! Squirt different paint colors onto a plate and use a brush to apply them to the bubbly side of the wrap. Don't be afraid to mix and match!
Time to make your mark! Place the painted bubble wrap onto your paper, bubble side down. Roll over it with the rolling pin, pressing gently. Carefully peel off the wrap to reveal your bubbly masterpiece! Wow, look at those amazing textures!
Try different patterns by overlapping prints or using various bubble sizes. You can even cut shapes from the wrap for themed designs. The possibilities are endless! And the best part? Clean-up is a breeze – just rinse the bubble wrap and reuse it for your next artistic adventure.
Cardboard Box Art Gallery
Even though bubble wrap printing is a blast, let's turn our attention to another exciting project: the cardboard box art gallery. It's time to release your inner curator and create a miniature museum right at home!
What you'll need:
- Large cardboard boxes
- Scissors or craft knife (with adult supervision)
- Paint or markers
- Glue
- String lights (optional)
Start by cutting windows and doors into your cardboard boxes. You're creating tiny rooms for your masterpieces! Paint the boxes inside and out – go wild with colors! Once dry, it's time to hang your artwork. Use push pins or tape to display your creations on the walls. Don't forget to make tiny benches for your visitors!
Want to add some pizzazz? String up some lights for a gallery-worthy ambiance. And here's the best part – you can change your exhibits whenever you want! From paintings to sculptures, your cardboard gallery can showcase it all.
This project isn't just fun, it's a great way to learn about curation and presentation. Plus, it's a box-cellent way to recycle! So, are you ready to open your very own art gallery?
Sponge Painting Exploration
Now that you've set up your miniature art gallery, let's get our hands messy with sponge painting! This fun technique is perfect for little artists to investigate texture and color. You'll need sponges, washable paint, paper, and a splash of creativity!
Here's how to start your sponge painting adventure:
- Cut sponges into different shapes (squares, triangles, circles)
- Pour paint onto paper plates or a palette
- Dip the sponges in paint and press onto paper – watch the magic happen!
Experiment with patterns, layering colors, and mixing shades. You can create scenery, abstract art, or even fun creatures! The possibilities are endless, and the results are always unique. Plus, it's a great way to work on fine motor skills and color recognition.
Don't be afraid to get messy – that's half the fun! Lay down some old newspapers to protect your work surface, and wear old clothes or a smock. Remember, there's no right or wrong way to sponge paint. Let your imagination run wild and see what masterpieces you can create. Who knows? You might just uncover the next Picasso or Monet in your family!
Curious Little Questions
How Can I Protect My Furniture and Floors During Messy Art Projects?
Imagine this: A lively explosion of creativity, without the worry of stains! You'll love these easy tricks to protect your space. First, lay down old newspapers or a plastic tablecloth – instant mess-catcher! For extra safety, use painter's tape to secure the edges. Don't forget to dress your little Picassos in smocks or old shirts. And here's a fun tip: Turn empty cereal boxes into mini easels! With these simple steps, you're all set for a splatter-free art adventure!
What Age Group Are These DIY Art Projects Most Suitable For?
You're in for a treat! These DIY art projects are perfect for kids aged 3 to 10. Younger ones will love the messy, hands-on fun, whereas older kids can tackle more complex creations. But hey, age is just a number! Even teens and adults can join in on the artsy action. The key is to pick projects that match your little artist's skills and interests. Remember, it's all about creativity and fun, so let their imagination run wild!
How Do I Encourage Creativity Without Being Too Controlling During Art Activities?
Let your little artist's imagination soar! Encourage creativity by providing a variety of materials and giving them the freedom to investigate. Don't worry about perfection – it's all about the process! Offer gentle guidance when asked, but resist the urge to take over. Praise their efforts and ask questions about their work. Remember, there's no right or wrong in art! By stepping back and letting them lead, you're nurturing their creative spirit and building confidence. Let the messy, colorful fun begin!
Are There Any Potential Allergies to Consider With These Art Materials?
Yes, you should definitely consider potential allergies when choosing art materials! Common allergens include latex in balloons or gloves, certain dyes, and glues. Watch out for nut-based products too! Always check labels carefully, and if you're unsure, ask parents about any allergies their kids might have. It's better to be safe than sorry! Remember, even natural materials like pollen or grass can cause reactions. By being mindful, you'll guarantee everyone can enjoy the artsy fun without any sneezy surprises!
How Can I Safely Store and Preserve My Child's Artwork Long-Term?
Your child's messy masterpieces deserve a place of honor! To preserve their artwork, start by creating a digital gallery. Snap photos of each piece and store them in the cloud. For physical storage, use acid-free folders or portfolio cases. Avoid direct sunlight and damp areas. Get creative with display ideas too! Rotate artwork on a clothesline or create a mini gallery wall. Remember, the best way to preserve memories is to cherish them together. Your little Picasso will love looking back on their artistic expedition!